
Last updated October 30, 2026
 Wrought iron
 Wood & steel frame
 Farm & ranch
 Sliding driveway gates
 LiftMaster operators
Free on-site gate assessment - hinges, posts, and your LiftMaster or Nice gate operator checked before anything is quoted
The assessment is free and the quote is the invoice.
Get your free estimateGate Repair Maintenance Checklist for Ontario Homeowners
Here’s a stat that surprises most people we talk to: the majority of gate repairs we’re called out for in Ontario aren’t caused by a part wearing out the way you’d expect a tire to wear. They’re caused by environmental stress that a standard, nationally written gate maintenance checklist never accounts for. You know the ones. They say “check for rust” and “lubricate the hinges.” Fine advice if your property sits in coastal fog. In our part of the Inland Empire, the top three culprits we see on a weekly basis are heat-baked electronic components, soil that shifts enough to pull a post out of plumb, and dust that glues itself to any greased surface. More specifically: heat-warped aluminum track, soil-shifted posts, and lubricant that’s become grinding paste.
We’ve designed this gate maintenance checklist to correct for those blind spots. It’s built around Ontario’s actual environment, not a generic seasonal template. What follows is a direct, owner-actionable list of what to check and when, plus a set of clear boundaries we never want a homeowner to cross alone. We’ll tell you which three items cause the most frequent and most expensive failures, and we’ll be honest about what you can safely inspect versus what requires a gate technician.
And we’ll anchor it to one core idea: a maintenance routine that ignores Ontario’s triple-digit summers, Santa Ana winds, and moving soil isn’t just incomplete. It’s the reason a lot of gate systems fail young.
When you’re done reading, you’ll have a seasonal and semi-annual sequence that takes less than an hour per season to execute, plus links to more guides & resources if you need deeper detail. You’ll also know exactly which alarms mean “call us now” versus “watch it for another month.”
Note: this is a general guide, not a replacement for inspecting your specific operator’s manual. If you own a LiftMaster, FAAC, BFT, Linear, Viking, Ghost Controls, DoorKing, Elite, or Mighty Mule operator, always defer to that manufacturer’s stated maintenance intervals. The following checklist is the Ontario-specific overlay we apply on top of those manuals here at Ontario Gate Company. When in doubt, call a gate specialist rather than improvising.
Let’s get into it.
Quick Answer
For homeowners in Ontario, CA, a comprehensive gate maintenance checklist should be run twice a year and focus on heat-stressed electronics, soil movement at the posts, dust-compromised lubrication points, and Santa Ana wind preparation. The two most commonly missed checks in our area are testing the operator housing for heat-related capacitor degradation after summer months, and measuring post plumb with a digital level on the same schedule. These two checks alone catch roughly half the failures we’re called out to diagnose.
Table of Contents
- Quick Answer
- The Ontario Seasonal Maintenance Schedule (When to Check What)
- The Owner-Only List vs. What to Leave to a Technician
- Heat-Specific Checks After Summer (and Sometimes After a Single Bad Week)
- Soil Movement Protocol: The Post Plumb Check That Prevents Binding Gates
- Santa Ana Wind Prep: How to Stop an Operator from Burning Out During Wind Events
- Lubrication: The Ontario-Specific Schedule (and the Mistake That Binds Everything)
- Entrapment Protection Sensors and Battery Backup: Check Them, Don’t Fix Them
- The Full Seasonal Checklist (Print and Use)
- Common Mistakes to Avoid
- When to Call a Professional
- Frequently Asked Questions
- The Bottom Line
The Ontario Seasonal Maintenance Schedule (When to Check What)
Ontario’s climate doesn’t follow the four-season model that most national gate maintenance guides assume. We get about four real seasons here, but they’re compressed and violent. What matters for a gate isn’t the name of the season. It’s the stressor. And the stressors here are: heat (May through October), wind (September through January, peaking during Santa Ana events), dust (year-round but worst from June through November), and rain (typically January through March, sometimes all at once).
That means a single autumn checklist written for a homeowner in Michigan isn’t going to serve you. Here’s the sequence we recommend for Ontario:
- Late April / early May (pre-heat inspection): This is the most important gate maintenance window in the Inland Empire. Check the operator housing, control board, and all power connections before the first triple-digit week hits. We’ll cover the heat-specific items below. This inspection sets the gate up for the hardest season of the year.
- Mid-October / November (post-heat and pre-wind inspection): This is the second critical window. By now, the summer has done its damage to capacitors and plastic housings. The Santa Ana winds are about to do their damage to moving parts. This is also the right time to check post plumb, because soil moisture has dropped over summer and the ground has contracted.
- January / February (post-rain cycle): Ontario doesn’t get a lot of rain, but when it comes, it saturates the clay-rich soil we have here. That’s when the opposite of the summer shift can happen: posts can heave, concrete pads can settle, and operators that were fine in November suddenly sit out of level. Check alignment and post plumb again.
- As-needed during Santa Ana events (any time the wind is forecast to exceed about 35 mph): More on this below. The short version: high-cycle wind events are when cheap gate operators die. A little preparation in September prevents the most common October/November call we get.
That four-point schedule covers about 90 percent of the environmental stress an Ontario gate system will ever see. Most of the actual repair work we do in this service area traces back to one of those four windows being skipped. And usually, it’s the first one: the pre-heat inspection in May that nobody does because the gate is working fine at the time.
That’s the trap. By the time a heat-stressed capacitor or a soil-shifted post has caused a visible failure, the damage is done. The maintenance checklist exists to catch the early warning signs, not to fix a gate that’s already stopped.
The Owner-Only List vs. What to Leave to a Technician
We’re going to be blunt about this because the injury statistics from garage door springs don’t get the same attention with gates, but the principle is identical. Some of the components on an automatic gate can kill you if you interact with them incorrectly. We’re specifically talking about high-tension gate springs, counterweights, and operators with capacitors that store a charge even after the power is disconnected. If your gate is a heavy iron or steel swing gate with a spring or counterweight system, do not attempt to adjust or release that spring. It’s under enough tension to break bone.
With that said, there’s a lot an Ontario homeowner can safely inspect. Here’s the simple division we teach customers:
Things you can inspect and, in most cases, fix yourself:
- Visual inspection of the gate’s movement path: look for debris, rocks, or vegetation that’s crept into the gate’s swing or slide path. This is the single most common cause of “my gate stopped closing” calls that turn out to be a 30-second fix.
- Visual inspection of the track (for slide gates): look for obvious warping, bent track sections, or missing fasteners. Don’t try to bend anything back into shape. Just note it and call if it looks bad.
- Photographing the operator interior: most residential operator housings have a front cover you can remove with a simple screwdriver. Flip the breaker off first. That’s non-negotiable. Then take a photo of the control board and any visible capacitors. If you see swollen, cracked, or leaking capacitors, call us with the photo. Don’t touch them.
- Lubrication of pivots and hinges: yes, there’s a right way and a wrong way in Ontario’s dust. We’ll cover it below.
- Checking post plumb with a digital level: this is one of the highest-value checks any homeowner can do, and we’ll give you the exact threshold below.
- Testing the gate’s reversing function: place a small object (a roll of paper towels works) in the gate’s path and see if the gate reverses. Do this on both open and close cycles. This is how you confirm the entrapment protection is doing its job.
Things a technician should inspect (and why):
- Loop detectors: these are buried in the ground and control free-exit and vehicle-detection. Diagnosing a failing loop requires a specific meter and a knowledge of how to read inductance values. It’s the most misdiagnosed component in gate repair. A “gate opens by itself” or “gate won’t close” complaint is frequently a loop detector issue that’s been masked by someone else adjusting the wrong setting.
- Battery backup systems: many Ontario gates now have battery backup for fire code or security reasons. These batteries are typically lead-acid or lithium and need to be load-tested, not just voltage-checked. A battery can read 12.8 volts and still be dead under load. We test them the same way we test a car battery: with a load tester, not a multimeter.
- Entrapment protection sensors (photocells, edge sensors): yes, you can test them from the user side, but calibrating or replacing them is a different matter. A misaligned photocell can cause intermittent failures that are nearly impossible to trace without understanding the control board’s logic. And some boards store fault codes that tell you exactly which sensor is failing. If you don’t know how to pull those codes, you’re guessing. We’d rather not guess with something that’s legally required on most automatic gates.
- Any spring or counterweight system under tension: covered above. Don’t touch it.
- Control board diagnosis: a control board can fail in a dozen different ways, and the symptoms often look identical to a bad limit switch or a bad safety sensor. This is where brand-specific knowledge actually matters. A BFT board behaves differently than a Linear board. The fault codes are different. The diagnostic sequence is different. If you’re not trained on your specific brand, you’ll spend hours and parts money swapping out things that were never broken.
This division is the core of our maintenance philosophy, and it’s the same one we apply on every Gate Repair in Ontario call: you own the simple visual and mechanical checks, we own the energized and calibrated components. That division keeps you safe and keeps your diagnostic costs low.
Heat-Specific Checks After Summer (and Sometimes After a Single Bad Week)
Inland Empire summers are hard on gate electronics in a way that coastal air never will be. The critical number we watch is about 105°F. That’s the point where the ambient air temperature starts to meaningfully degrade the lifespan of electrolytic capacitors, which are the single most common electronic failure point in gate operators. Capacitors are used in the motor start circuits and, in some designs, in the power supply filtering. They have a rated operating temperature, typically 85°C or 105°C, and each 10°C above the rated limit roughly halves their useful life.
Here’s the part that surprises most homeowners: the inside of a gate operator housing, especially a dark-colored metal housing in direct Ontario sun, runs significantly hotter than the air temperature. We’ve measured operator housing interiors at over 130°F on a 105°F day. The housing becomes an oven. That’s the condition that kills capacitors. And it doesn’t kill them dramatically. They bulge, dry out, leak, and the gate becomes slow to start, hesitant, or eventually stops opening entirely.
So the late-summer or early-fall check isn’t just “look at the operator.” It’s a specific series of observations:
- Open the operator housing (breaker off, as always). Look at the control board and any cylindrical components. A healthy capacitor has a completely flat top. If you see any bulging, domed tops, or a brown/white crust near the base, that’s a capacitor in failure. It’s not a “maybe.” It’s a replacement item.
- Smell. A burned or overheated electronic component releases a distinct acrid smell, somewhere between burnt plastic and burnt coffee. If you smell it when you open the housing, something inside has overheated. Note it. That’s a service call indicator.
- Check the housing itself. Is the operator enclosure mounted in direct afternoon sun with no shade? Some Ontario neighborhoods have zero tree cover, and a west-facing metal box takes direct sun from noon through sunset. A simple shade structure or even a heat-reflective paint on the housing (check with the manufacturer first) can extend the life of the electronics inside by years. We’re not against a little passive cooling on the enclosure.
- Check the motor’s duty cycle. Every motor is rated for a certain number of cycles per hour. In summer, if you’re cycling the gate more often (kids home, more visitors, pool gate coming and going), you may be exceeding the rated duty cycle without knowing it. Duty-cycle overload causes thermal trips. If your gate stops working in the late afternoon and starts working again in the evening, that’s a thermal overload pattern. It’s not a ghost. It’s the motor telling you it’s too hot.
One more note specific to Ontario summmers: do not try to cool an operator by spraying it with water. It’s a sealed enclosure, but water from a hose can find its way in through the conduit and damage the board. If an operator is overheating repeatedly, the fix is a reduced load (like adjusting the gate’s closing force), a shaded housing, or a motor that’s properly matched to the gate’s weight. Not a garden hose.
Soil Movement Protocol: The Post Plumb Check That Prevents Binding Gates
Here’s the thing almost no national gate maintenance guide mentions: Ontario sits on expansive clay soil. That soil swells when it gets wet and shrinks when it dries out. Over a year, that expansion and contraction cycle can move a gate post enough to throw the gate out of alignment. And a gate that’s out of alignment doesn’t just look wrong. It fights the operator. The motor has to work harder on every cycle. The hinges and bearings wear unevenly. Eventually, the gate binds and the operator either overloads and trips, or burns out trying.
We see this every year. A homeowner calls and says, “The gate was working fine, and now it’s slow and grinding, and the operator is loud.” We arrive, check the posts, and find one has drifted by half an inch. That half-inch is enough to ruin a gate’s geometry, especially on a heavy iron swing gate.
The fix isn’t dramatic. It’s regular measurement. Here’s the protocol we recommend for any Ontario homeowner with a swing gate or a slide gate on posts:
- Buy a digital level. Not a bubble level. A digital level with a readout in degrees. They’re inexpensive and the precision matters. A bubble level won’t reliably show a one-degree drift, and one degree on a tall post is a lot of movement at the top.
- Establish a baseline. Pick a day when the gate is working perfectly and the weather has been mild. Measure each post and each gate leaf. Write down the reading for every post on the hinge side and the latch side. That’s your reference number. Without a baseline, you won’t know if a post has moved.
- Repeat in May and again in November. Same posts, same position of the level, same side of the post. Write down the numbers. If they match your baseline, great. If a post has shifted more than one degree from baseline, that’s the threshold at which we recommend a professional evaluation. It may not need a reset yet, but something is moving underground, and ignoring it will only make the next repair bigger.
- If you’re not sure whether the movement is real or just a level artifact, take a photo of the level’s reading next to the post. We’ve had customers send us these photos, and sometimes they’re the key to diagnosing a gate that’s slowly degrading. A series of three measurements over 18 months tells us more than any single visit ever could.
One clarification: post movement is not always visible to the naked eye. By the time you can see a post leaning, it’s usually far past the point where it should have been addressed. The digital level catches drift early, long before the gate starts binding. That’s the entire point of the protocol.
Soil movement also affects underground conduit and loop wires. As the soil shifts, it can stretch or stress buried wire, especially loop detector wire. The symptom is often intermittent: the gate won’t open for a car in the morning, then works fine in the afternoon. If you’re seeing a pattern like that, mention it to us when you call. It points us toward a loop or wire issue rather than a board or motor issue.
Santa Ana Wind Prep: How to Stop an Operator from Burning Out During Wind Events
Santa Ana winds are a uniquely destructive force for automatic gates in Ontario, and they don’t get enough attention in gate maintenance guides written for other regions. The problem isn’t just that wind is strong. It’s that it’s sustained, often for multiple days. A gate that’s designed to operate under normal conditions with low wind resistance suddenly becomes a sail. A 300-pound metal gate catching a 40 mph gust generates a force far beyond its static weight. The operator has to fight that force on every open and close cycle.
Here’s the failure sequence we’ve seen many times: the wind blows, the gate struggles, the operator’s thermal protection trips, the homeowner resets the breaker and tries again, and the motor, already heat-stressed from summer, fails. By the time the wind event is over, the gate is dead. And the worst part is that the operator didn’t fail because it was cheap. It failed because the gate wasn’t set up to handle the wind loads it experienced.
There are two specific checks we recommend before Santa Ana season, which in Ontario typically runs from late September through January:
- Gate stop and limit switch verification. A gate stop is the physical point (usually a post or a metal stop) where the gate comes to rest at full open and full close. The limit switch is the electronic component that tells the operator “you’re done, stop pushing.” In a properly configured system, the gate hits the physical stop at the same moment the limit switch engages. In a poorly configured system, the gate slams into the stop and the operator keeps pushing against it for a second or two. That pushing is motor-killing on a normal day. In sustained wind, it’s how you burn out a motor in a single afternoon. If you hear a loud “clunk” or feel a vibration when the gate reaches the end of its travel, the limit switch and the stop are out of sync. That’s a service call. Not a DIY adjustment, because the limit switch logic on some boards (we see this on Linear and Viking operators, among others) is easy to misconfigure and can disable entrapment protection if done wrong.
- Check the gate’s physical latches and locks. In high wind, a gate that isn’t positively latched at full close will rock back and forth. That rocking transfers stress to the hinges, the operator’s gearbox, and the limit switch mechanism. Over a two-day Santa Ana event, that rocking can loosen bolts, wear out hinge bushings, and cause the gate to fail to trigger the close limit consistently. The operator then keeps running when it shouldn’t. If your gate has a mechanical latch or lock that engages at full close, test it. If it doesn’t engage cleanly, have it adjusted before the wind season.
Another wind-specific consideration: if you have a slide gate, wind-driven debris (palm fronds, tumbleweeds, construction trash) collects against the track more aggressively during Santa Anas. Check the track once per day during an extended wind event. A gate trying to slide through a pile of debris is the same as a motor trying to push through a brick wall.
And a note about Ghost Controls and similar aftermarket openers: these are popular on residential gates in Ontario, and they’re generally well built, but they have lower torque ratings than commercial operators. During wind events, the clutch or limit mechanism can slip. If you hear a ratcheting or clicking sound during a wind gust, that’s the clutch protecting the motor. It’s doing its job, but repeatedly slipping the clutch under wind load will eventually wear it out. The long-term fix is a gate that’s balanced and not fighting the wind, which sometimes means adding a wind strut or adjusting the gate’s closing force.
Lubrication: The Ontario-Specific Schedule (and the Mistake That Binds Everything)
Every gate maintenance guide tells you to lubricate the hinges. Here’s what they get wrong for Inland Empire conditions: Ontario is dry and dusty. That means oil-based lubricants, especially anything with a light viscosity, attract dust. Within a few weeks, the oil and dust combine into a paste that’s actually more abrasive than no lubricant at all. We see this on a lot of gates we’re called out to repair. The owner did the “right” thing and lubricated, and now the hinges are binding worse than before.
The solution isn’t no lubrication. It’s the right lubrication and the right schedule. Here’s what has worked best on the gates we maintain in this climate:
- Use a dry-film or graphite-based lubricant on sliding metal surfaces. Dry lubricants don’t attract dust the way oil does. For sliding gate tracks, a graphite-based dry spray is the cleanest option. It leaves a thin, dry film that reduces friction without becoming a dust magnet.
- For hinge pins on swing gates, use a heavier, grease-based lubricant rather than spray oil. Heavier grease stays in place and seals out dust better than thin oil. Apply it sparingly. A little goes a long way. If you can see grease squeezing out of the hinge, you used too much, and the excess will collect dust and dirt.
- Reduce the frequency. Most national guides say “lubricate every 3 months.” In Ontario’s dust, quarterly oiling creates a buildup problem. We recommend lubricating hinges and pivot points every 6 months, and specifically choosing a lubricant with a dust-resistant rating. The twice-yearly schedule aligns perfectly with our May and November inspection windows.
- Do not lubricate the electronics or the operator’s internal mechanism. The motor and gear assembly inside the operator housing is typically sealed and pre-lubricated from the factory. Adding oil or grease to the inside of the housing is a fast way to short out a control board or contaminate a sealed gearbox. If the operator’s internal mechanism is noisy, that’s a bearing or gear issue for a technician. Not a lubrication request.
- Wipe, don’t spray, if you’re unsure. If a pivot looks dry but you’re not sure whether lubricant is appropriate, dampen a cloth with the lubricant and wipe it on. This minimizes overspray, keeps lubricant off the surrounding paint and concrete, and prevents the “lube everything” impulse that ruins more gates than neglect ever does.
One more thing: chain-drive slide gates are common in Ontario, and they do need periodic chain tension checks. A chain that’s too loose can slip on the sprockets and cause the gate to jerk or stall. A chain that’s too tight wears out the sprocket bearings and the operator’s gearbox. Chain tension is a technician-level adjustment. Don’t try to tighten a chain yourself unless your owner’s manual specifically says it’s a homeowner task. Most don’t. Mention it when you’re scheduling any seasonal inspection, and we’ll check it during the visit.
Entrapment Protection Sensors and Battery Backup: Check Them, Don’t Fix Them
Automatic gates in Ontario are required to have entrapment protection devices. That typically means photo-eye sensors on the gate posts, and sometimes physical edge sensors on the gate leaf itself. These are the components that stop the gate if something or someone is in the path. They’re not optional, and they’re not a luxury. In our experience, they’re also the most frequently bypassed or ignored component on a residential gate.
Here’s the honest truth about these sensors: you should test them, but you should not attempt to repair or recalibrate them yourself. The reason is simple. A misaligned or malfunctioning photo-eye can cause a gate to reverse unexpectedly, or worse, fail to reverse when it should. And the symptoms can be intermittent. The sensor might work fine for a week, then fail exactly when the afternoon sun hits it at a certain angle. We call it a “sun blind” condition, and it’s one of the most frustrating intermittent failures to diagnose. It requires knowing how to read fault codes on the control board and understanding the sensor’s alignment tolerances. A BFT sensor and a Viking sensor, for example, have different alignment procedures.
Your job as the owner is to test the reversing function regularly. Here’s the simple version:
- Test with a non-damaging object. A roll of paper towels or a small cardboard box works. Place it in the gate’s path. Trigger the gate to close. The gate should reverse or stop before making contact with the object. If it doesn’t, stop using the gate and call us. Do not continue cycling a gate with failed entrapment protection. That’s a liability issue and, more importantly, it’s dangerous for anyone who uses the gate, including kids and pets.
- Test both directions. Some gates only reverse in one direction because the sensors are only installed on one side. Your gate should have protection in both the open and close direction, depending on the configuration. Test both.
- Also test the manual release. Every automatic gate should have a manual release mechanism, often a key or a release lever, that allows you to operate the gate by hand in a power outage. Test it once a year. Some releases get stiff in our dry conditions, and if you’ve never tested it, it may not work when the power is out and the Santa Anas have knocked out your utility feed.
Battery backup systems deserve the same respect. If your gate has battery backup, it should run the gate for a limited number of cycles when utility power is out. The battery needs to be load-tested periodically, and that’s a technician task. A battery that reads fine on a multimeter can still fail under the load of starting a motor. We use a specific load tester for this exact reason. And in Ontario’s heat, sealed lead-acid batteries degrade faster than they do in cooler climates. If your battery backup is more than three years old and has lived through a few Inland Empire summers, have it tested before you need it.
If your gate doesn’t have battery backup and you’re interested in adding it, that’s a conversation worth having, especially if the gate is your primary access point and you don’t have a manual pedestrian gate. We can discuss options as part of a Electric Gate Repair in Ontario visit or a separate consultation.
The Full Seasonal Checklist (Print and Use)
Here’s the consolidated version of everything above, in a sequence you can work through in about 45 minutes. We’ve formatted it for both the spring pre-heat inspection and the fall post-heat pre-wind inspection. The January post-rain check uses the same list, with extra attention paid to the post plumb and soil movement items.
- Power down the operator at the breaker. Confirm the gate won’t move. Never skip this step.
- Clear the gate’s path. Remove rocks, debris, vegetation, toys, and anything that’s migrated into the swing or slide area. Check the track for slide gates.
- Inspect the operator housing visually from the outside. Look for cracks, warping, or heat discoloration. Open the housing (breaker still off) and photograph the board. Check for bulging capacitors and burnt smells.
- Check post plumb with a digital level on both hinge-side and latch-side posts, and on the gate leaf itself if it’s a swing gate. Compare to your baseline. More than one degree of drift = schedule a professional look.
- Test the gate’s balance (for swing gates with a manual release): release the gate and push it by hand. It should move smoothly and stay roughly where you leave it, not drift open or closed on its own. If it drifts, the gate is out of balance and the operator is working harder than it should.
- Lubricate only the correct points with the correct lubricant as described above. Hinge pins and pivot points only, using a dust-resistant grease or dry film. Do not oil the electronics.
- Test the reversing function in both directions using the paper towel roll test. If it doesn’t reverse, stop using the gate and call for service.
- Check limit switches and gate stops by running the gate through a full open/close cycle while watching and listening. Any clunking, grinding, or continued motor noise after the gate reaches its stop is a problem.
- Test the manual release (for power outage scenarios). Confirm you can operate the gate by hand if you need to.
- Test any access control devices (keypads, remotes, intercom). Replace remote batteries annually. Check that the keypad buttons aren’t sticking, which is common in our heat and dust.
- Note anything you saw or heard that seemed off. Write it down in your maintenance log. If it’s not urgent, mention it next time you call us. If it is urgent, call now.
Common Mistakes to Avoid
- Lubricating with the wrong oil in the wrong place. Using WD-40 or similar light spray oil on hinges in Ontario’s dust creates grinding paste faster than neglect would. Use heavier grease on hinge pins, and nothing at all on the electronics. We see more self-inflicted binding from over-lubrication than from under-lubrication.
- Ignoring the post plumb check because “the gate still opens.” Post drift is slow and quiet. By the time the gate binds, the post has moved enough that the repair is now a post reset and re-alignment, not just a simple adjustment. The digital level catches it a year earlier and hundreds of dollars cheaper.
- Resetting a tripped breaker without investigating why it tripped. On a hot Ontario summer day, a tripped breaker usually means thermal overload on the motor. Resetting it and running the gate again overheats the motor further. Each reset cycle pushes the motor closer to permanent failure. Let it cool down first, and check for obstructions or binding.
- Bypassing or disconnecting the entrapment sensors because they’re “annoying.” Sensors that repeatedly false-trigger are annoying, yes. But disconnecting them is dangerous and often illegal. The correct fix is diagnosing why the sensor is false-triggering, which is usually a misalignment or a sun-glare issue that a technician can resolve in one visit.
- Skipping the manual release test until the power goes out. The manual release mechanism gets stiff in our dry, dusty conditions. If you’ve never tested it, and the power goes out during a Santa Ana wind event, you’re locked out or locked in. Test it annually. That’s a five-minute task that saves a lot of panic.
- Assuming all operators are the same. A Linear operator and a BFT operator have different limit switch logic. A Viking slide gate operator works differently than a Ghost Controls opener. If someone shows up to diagnose your gate and doesn’t ask what brand and model you have, they’re guessing. Brand-specific diagnosis is the entire reason a gate specialist beats a general handyman on this repair.
When to Call a Professional
If you work through the checklist above and one of the following shows up, stop and call. Don’t keep running the gate. Don’t keep resetting the breaker. Don’t wait to see if it fixes itself.
- Bulging or leaking capacitors in the operator housing. This is a component failure, and it will not improve. The gate may still work for weeks, then die completely at the worst possible moment.
- Any post drift of more than one degree. This is a structural and alignment issue, not a mechanical adjustment. A pro needs to evaluate the soil movement and decide whether the post needs to be reset.
- A gate that doesn’t reverse when tested. This is an entrapment protection failure. It’s a safety issue first, and a mechanical issue second. Stop using the gate.
- A motor that’s loud, hot, or vibrating during normal operation. This is often the first sign of bearing wear, gear wear, or a load imbalance. Letting it continue accelerates the damage.
- Any spring, counterweight, or tension system issue. As we said above, these are under enough tension to cause serious injury. Professional only.
If you’re in the Ontario area and any of these apply, we’ll send a gate specialist to your property. We diagnose on-site, and an estimate is free. Call (855) 707-3634 to schedule, or reach out through our site. We’re a gate-only shop, which means the person who shows up is trained on gate systems, not multi-trade general work. If it’s an electric gate repair issue, we’ll trace the specific component. If it’s a mechanical issue, we’ll find the source of the binding. If you’re not sure which it is, that’s what the free estimate is for.
And if you’ve been putting off
Styles & brands we work with
See the difference
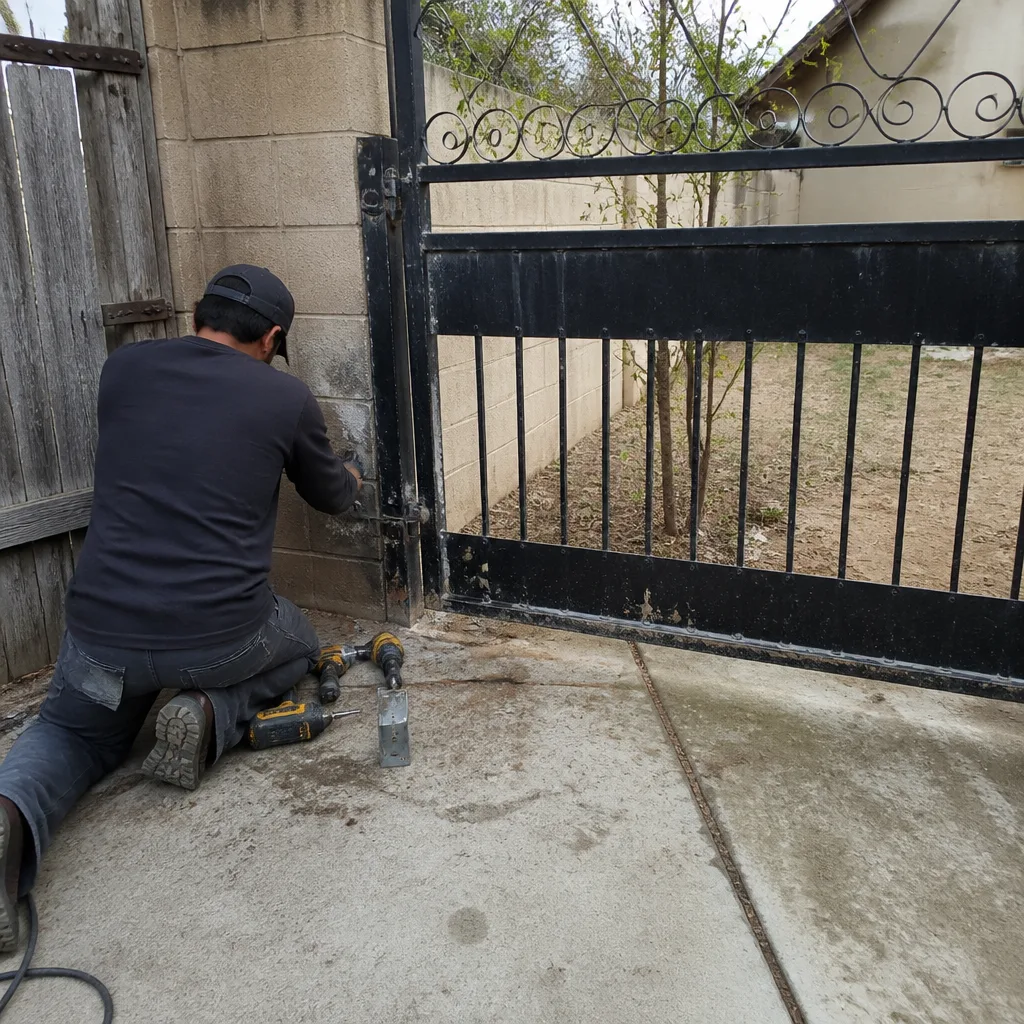 Before
 After
 Before
 After
 Before
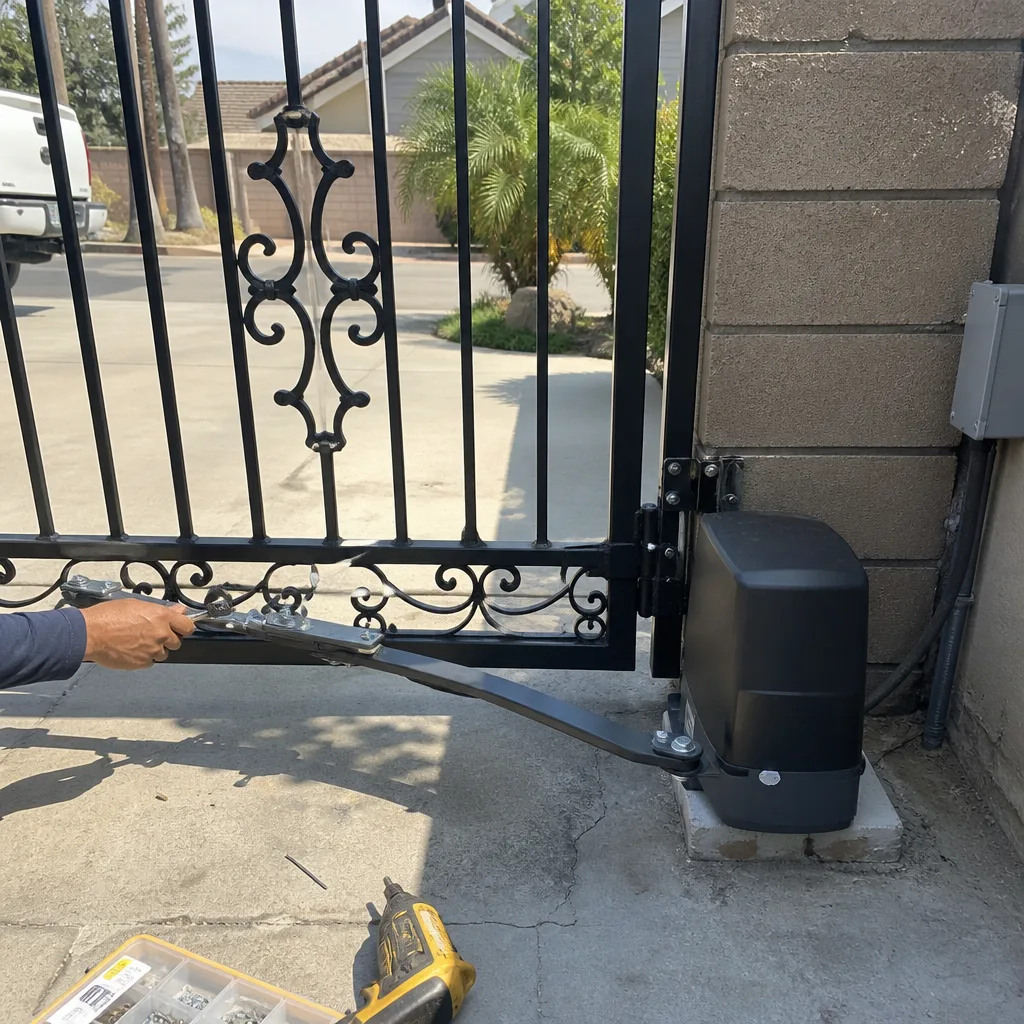 After